Showing posts with label Make it. Show all posts

Monday, December 22, 2014

DIY Christmas Gifts

Happy Monday everyone! Christmas is Thursday and I'm happy to say that I have all of my shopping and wrapping done. For once, I had everything done weeks in advance so I'm pretty happy with myself. Do you have all of your shopping and wrapping done?


DIY Christmas Gifts

Every year I make all of the gifts that I give out by hand. I always try to make things that everyone can use. And honestly, there's nothing more useful than food. If you're stuck on what to get that special someone, here are the presents I made this year. These DIY dip mixes are not only easy to make but delicious as well.


Grab your printable label here.

Garlic 'N Chives Mix

  • 1 tsp garlic powder
  • 1 tsp garlic salt
  • 1 tsp celery seed
  • 2 tsp minced onions
  • 4 tsp dried chives

How to Make This Mix

  1. Mix all of the ingredients together.
  2. Place ingredients in an air tight bag.
  3. Print out, cut out, and staple label to bag.

Grab your printable label here.

Veggie Dip Mix

  • ½ tsp paprika
  • ½ tsp dill weed
  • 1 tsp garlic salt
  • 1 tbs chives

How to Make This Mix

  1. Mix all of the ingredients together.
  2. Place ingredients in an air tight bag.
  3. Print out, cut out, and staple label to bag.
Grab your printable label here.

Italian Dip Mix

  • 2 ½ tsp celery seeds
  • 2 ½ tsp paprika
  • 2 ½ tsp garlic powder
  • 2 ½ tsp onion powder
  • 2 ½ tsp paprika

How to Make This Mix

  1. Mix all of the ingredients together.
  2. Place ingredients in an air tight bag.
  3. Print out, cut out, and staple label to bag.

Do you get your Christmas shopping done way before Christmas or do you wait to the last minute? If you are an early bird, do you have any tips or tricks that you'd like to share? Leave any questions, comments, or personal stories in the section below! I love reading your comments.

If you would like more of Methodical Living follow me on Facebook, Twitter, and Pinterest.


Wednesday, November 19, 2014

How to Make Your House Smell Good

Good morning all of you lovely people! Today, I want to focus on the holidays and how to make your home smell good. The holidays are looming closer and closer. I love this time of the year and I love the holidays, especially Thanksgiving and Christmas. The fact that I can get together with my family and friends to enjoy great food and share even better memories fills my entire body with warmth and good feelings.

how to make your house smell good

The Scent of the Holidays

Smells have a funny way of bringing back memories and I associate those delicious smells of turkey, cranberries, and other goodies with the holidays. Sometimes I want to enjoy those delicious smells of the holidays but I don't want to do all of that work. So, here is a great way to fill your house with the delicious smells of Thanksgiving and Christmas with just a few simple ingredients.

How to Make Your Home Smell Good

how to make your house smell good

What You Need:

  • Ground Cinnamon
  • Cinnamon and Sugar
  • Cinnamon Sticks
  • Dried Cranberries
  • Oranges
  • Crushed Cloves

What to do:

  1. Mix the ingredients above in a large pan with water.
  2. Let the mixture simmer on low.
  3. Be sure to check up on the water every so often and add more as needed.
  4. Enjoy the smell of the holidays throughout your entire house.

What holiday smells are your favorite? How do you make your home smell good? I love reading all of your lovely replies so feel free to leave any comments, questions, or personal stories in the comment section below!

If you would like to see something featured on Methodical Living please send me an email at Methodicalliving@yahoo.com and I will do my best to have a post up as soon as possible!

If you would like more of Methodical Living follow me on Facebook, Twitter, or Pinterest!

Monday, November 17, 2014

Psychology of Color and Home Decor

Good morning everyone! Today, I would like to discuss the importance of picking the right color for that one room in your house. You know “that room” that is dated and you've been talking about sprucing it up since forever. Yeah, that one.

Does color really matter?

Nothing can change the personality and feel of a room quite like the color of the walls that is unless you do some major renovating. The color you choose to paint a room can have several effects on the outcome of your decorating endeavors. On the positive side, the color can make the room more inviting, calming, or open. But on the opposite side of the spectrum, the color you choose can make the room look smaller, darker, or dated. Choosing the right color can be a toughy- believe me I've been trying to come up with the perfect color scheme for my future living room for a few years now.


Luckily, I have time to decide what will work for me and my family and what colors are just off limits. For example, I'm into bright colors that really open up a room. My husband on the other hand likes darker colors, and absolutely hates the color yellow (which I'm quite fond of in small doses)! So, when we actually have a space that we can paint without fear of a land lord's disapproval there will be a lot of compromise But, there are some colors that we absolutely agree with each other on 100%, and that's always a great thing.


Personally, I am a lover of the neutral colors especially gray. That is actually what I want to paint my future living room, and then I'll add hints of colors to really catch the eye. Neutral colors are great when you are in a situation like the one my husband and I are in because they don't really go out of style and they are simple but functional.

Neutral Colors

If you're not into neutral colors that is okay too! Just remember that colors can be a very powerful tool in home decorating. Certain colors are more suitable for different rooms in your house. For example, blue is a great color to use in your bedroom because of the calming properties the color possesses. My mom's bedroom is this beautiful sage green that is absolutely gorgeous! Since green is a mix of blue and yellow it definitely has a lot of the calming aspects of blue.

How Colors Affect Us


  • Yellow: Cheery and warm. Can hurt your eyes. Has been proven to make a baby cry.
  • Green: Tranquil and serene. Is seen as being more natural than other colors.
  • Blue: Calming and serene. Has been proven to lessen appetite.
  • Purple: Creative and thought provoking. Is seen as being related to royalty and very luxurious. 
  • Red: Passionate and intense. Has been proven to stimulate appetite.
  • Orange: Excites and warms. Is seen as being youthful and generates happiness. 
  • Black: Sophistication and mystery. Has been linked with death or evil.
  • White: Hope, light, and purity. Gives the feeling of cleanliness and simplicity.
  • Gray: Authority and maturity. Is stable and strengthens character.  


Are you affected by the psychology of color or do you just pick whatever colors you like? I love reading all of your lovely replies so feel free to leave any comments, questions, or personal stories in the comment section below!

If you would like to see something featured on Methodical Living please send me an email at Methodicalliving@yahoo.com and I will do my best to have a post up as soon as possible!

If you would like more of Methodical Living follow me on Facebook, Twitter, or Pinterest! 


Wednesday, November 12, 2014

20 Delicious Desserts for Any Holiday Gathering

Thanksgiving and Christmas are just around the corner and you know what that means-family gatherings, parties, and general merriment. Are you ready to dump your diet and jump on the holiday bandwagon? Families, friends, and coworkers will gather to enjoy delicious foods and make great memories together.

At my family gatherings we feel no shame in admitting that we have dumped our healthy eating habits for a couple of months. My family gatherings usually include more desserts than actual food so you know that we love our sweets. I have to admit though that sometimes I get tired of the same old desserts year after year. So, here are twenty delicious desserts to take your holiday gatherings to the next level this year.


{Busy at Home}{Domestic Mommyhood}{Flour on My Face}{Domestic Mommyhood}


  1. Easy Homemade Fudge Recipe
  2. Glorious Apple Pie Cinnamon Rolls Recipe
  3. Blueberry Peach Dessert Monkfruit in the Raw
  4. Tiramisu Affogato Coffee Dessert Recipe
  5. Oreo Cheesecake
  6. Cherry Chocolate Kiss Cookies
  7. Chocolate Pudding Cake
  8. Trifle Dessert Recipe
  9. Decadent Black Forest Cake Recipe
  10. Strawberry Refrigerator Cake
  11. Vintage Blackberry Pie Pops
  12. Easy Chocolate Chip Cheesecake
  13. Homemade Chocolate Pudding
  14. Funnel Cake Bites Recipe
  15. Raspberry Tart Recipe
  16. Crock-pot Blueberry Cobbler
  17. Peanut Butter Gooey Bars
  18. Divinely Chocolate Cake
  19. Rocky Road Pudding Dessert Recipe
  20. Raspberry Angel Dessert Recipe

Do you have a favorite holiday dessert? I love reading all of your comments so feel free to leave all comments, questions, and personal stories in the comment section below!


Wednesday, November 5, 2014

How to Clean Stainless Steel Sink Naturally

Good morning everyone!

Have you been struggling with getting your kitchen sink to shine? I was saddened and a little bit angry to find out that all of my hard work was getting me nowhere. No matter how hard I scrubbed, I wasn't able to get my sink to shine the way I wanted it too.

Luckily, I had some homemade lemon extract that I had made last year. At the time, I wanted to use it to get rid of the occasional flea. There was a time that I sprayed it on my furniture, but it didn't works as well as I had hoped. So, I put it up on a shelf and forgot about it until recently. This lemon extract is the perfect way to get my sink to shine to its fullest potential.

How to Clean Stainless Steel Sink Naturally

Here's how to make lemon extract:

  1. Grate the peels of at least 3-4 lemons.
  2. Cut up the rest of the lemon pieces.
  3. Boil the lemons in about 2 quarts of water.
  4. Bottle the mixture and let it sit for a bit.

How to Clean Stainless Steel Sink Naturally

How to Clean Stainless Steel Sink Naturally

How to get your sinks to shine:

  1. Soak a paper towel in your lemon extract.
  2. Wipe down your sink.
  3. Watch how it shines!


How to Clean Stainless Steel Sink Naturally

How to Clean Stainless Steel Sink Naturally

I love reading all of your lovely replies so feel free to leave any comments, questions, or personal stories in the comment section below!

If you would like to see something featured on Methodical Living please send me an email at Methodicalliving@yahoo.com and I will do my best to have a post up as soon as possible!

If you would like more of Methodical Living follow me on Facebook, Twitter, or Pinterest

Monday, October 13, 2014

Sugar and Coconut Oil Facial Scrub

Happy Monday everyone! I hope that everyone enjoyed their weekends. I know that I enjoyed vegging out and watch my favorite shows with my hubby. That's the best thing about being pregnant for me. 


In this post, I'd like to share a facial scrub recipe that I absolutely love! Not many people know this but I'm a closeted fan of all things girly. Behind closed doors, I love doing my nails, facials, and dressing up. I don't really enjoy makeup, but everything else is totally up for grabs for me. 

I have major skin problems. My main problem is with white heads. I've been battling them for years and nothing seems to work. I've used every sort of chemical and harsh toxin known to the world. Well, nothing except exfoliating. I hate those high priced exfoliating products that never work.


Ingredients:


  • coconut oil
  • sugar

Directions:


  1. Mix equal parts of coconut oil and sugar into a small bowl. You are looking for a grainy consistency.
  2. Apply mixture to a clean face in circular motions.
  3. Wash your face clean and pat dry.


This is one of the best natural exfoliators and I always, always, always use this all natural mixture. I've found that coconut oil is light enough to not clog my pores like olive oil. Plus, I get to smell slightly like coconut for the rest of the day!

Do you have a favorite all natural exfoliator? If so, I'd love to hear about what you use! Feel free to leave any questions, comments, or personal stories in the comment section below!


If you need help tackling your organizing obstacles feel free to email me (at methodicalliving@yahoo.com) and I'll do my best to help you out!


Tuesday, March 18, 2014

Make Your Own Jewelry Holder

Cute storage idea, right? I absolutely love it, and plus, who doesn't love dinosaurs.

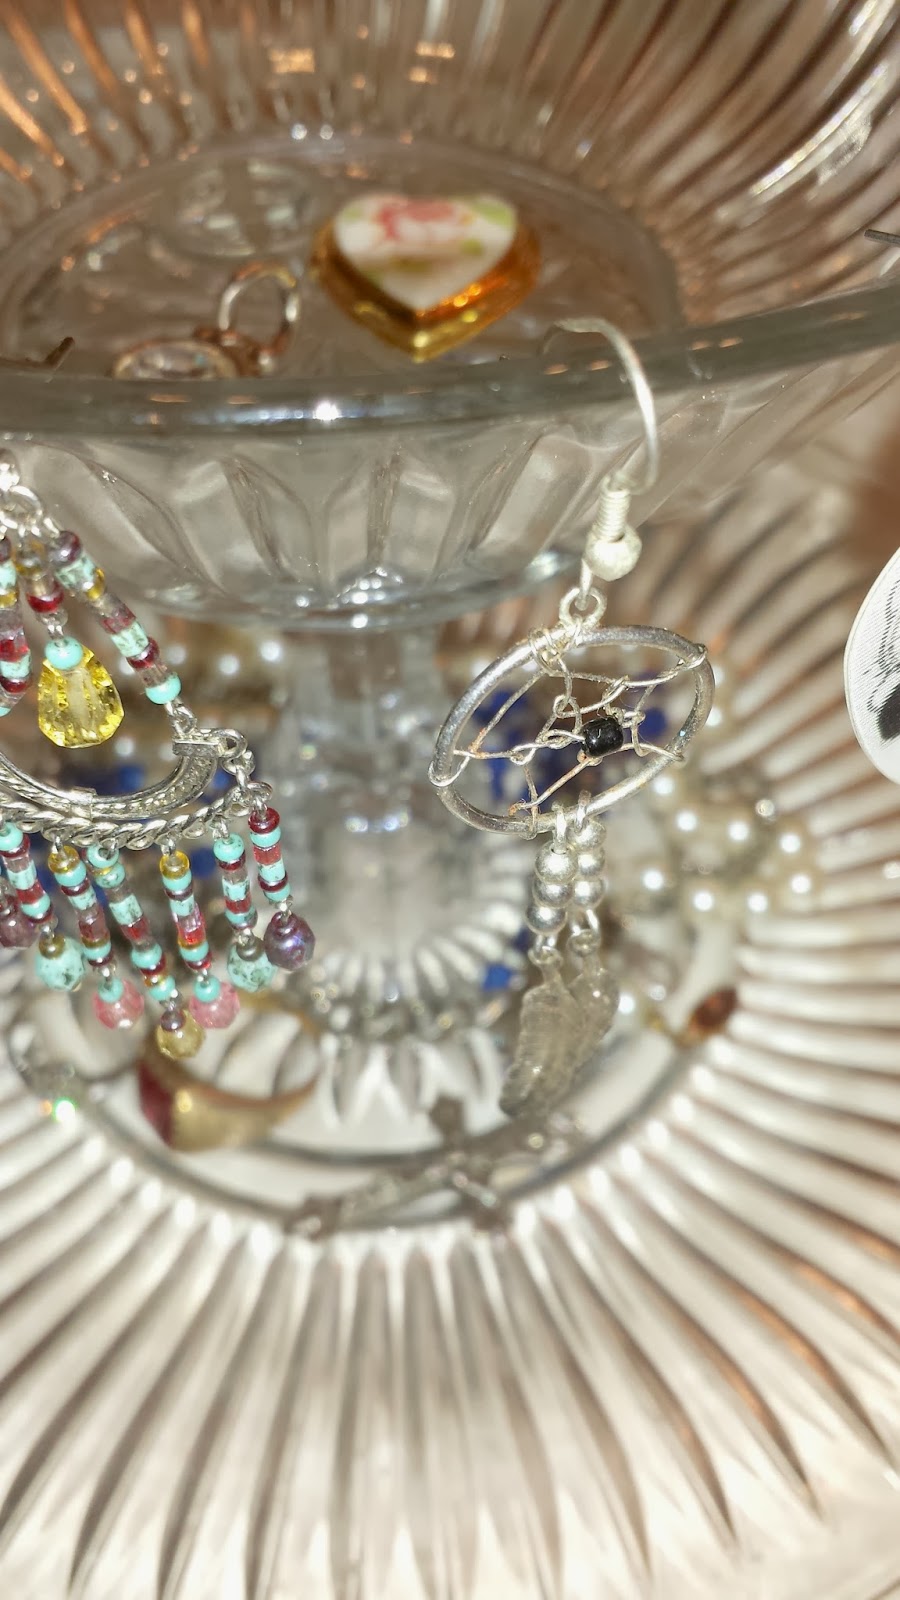
I don't know about you, but I have a difficult time keeping all of my beloved jewelry together in one place. I've found rings scattered, bracelets in an assortment of drawers, and necklaces in who knows where. So, I decided to make my own jewelry holder.

As usual, I was perusing the dollar store and found the cutest dinosaur ever, except for the color, of course. I dug around some more, and found a cute, little dish to go with my cute friend. Usually I have no idea what I'm going to create when I get stuff from the dollar store, but this time was different. I knew right away what I was going to do.

Make Your Own Jewelry Holder

Make Your Own Jewelry Holder

What You'll Need to Make Your Own Jewelry Holder:

  • one dinosaur or other cute figure
  • spray paint
  • super glue
  • small dish

Directions to Make Your Own Jewelry Holder:

  1. Spray paint your figure any color you want. Make sure that the weather conditions are right. When I painted my figure, it was a little windy so that made it a bit tricky, but I was able to manage.
  2. Wait for it to dry.
  3. Examine the figure to make sure it doesn't need to be painted again. I actually painted my dino a few times before I got the color that I wanted.
  4. Clean out your small dish and make sure that it is completely dry.
  5. Apply super glue to your figure's feet. Before I did this step, I used a razor knife to cut the extra paint off of my figure's feet so that it would stick better.
  6. Wait for the glue to dry.
  7. Decorate your jewelry holder with all of your beloved jewelry!
Make Your Own Jewelry Holder
My dino holding stacks of rings!

Make Your Own Jewelry Holder
How cute is he?

Questions? Comments?

Feel free to leave any questions or comments that pop into your head below in the comments section! If you have any other questions, feel free to email me here.


Thursday, March 6, 2014

Onion Dip Recipe

Hello everyone! I hope that everyone is having a great Thursday! Its chilly, windy, and terrible here on the North Georgia mountains. If you're experiencing the same kind of terrible weather where you are, I have the perfect recipe to share with you today.

Seriously, the best dip ever

My mom and I have been making this onion dip for years, and it is always delicious. I always gain about a million pounds after stuffing myself, but it is SO worth the calories. This onion dip recipe was even featured at my wedding almost three years ago. The husband and I even carried the leftovers on our honeymoon, and ate every single bit of it. I hope that you guys enjoy this onion dip recipe as much as my family and I have over the years.

Onion Dip Recipe Ingredients

2 tablespoons of butter
3 large onions (I like to use Vidalia but sweet onions are fine too)
2 cups of mayonnaise
1 ½ cups of swiss cheese
½ cup of Parmesan
¼ cup dry white wine (I used chardonnay)
1 clove of garlic
½ teaspoon hot sauce
1 loaf of multi grain bread to dip

Onion Dip Recipe Directions

Pre-heat your oven to 375.
Saute your onions in a large skillet by melting the butter over medium high heat for 10 minutes or until the onions are tender.
Mix the swiss cheese, parmesan, mayonnaise, garlic, wine, and hot sauce together. Gradually stir in the onion. Make sure that the mixture is consistent.
Cook for 25 minutes, until the cheese bubbles.
Let the dip stand for 10 minutes.

Questions? Comments?

Feel free to leave any questions or comments below! If you do make this onion dip, I would love to hear your thoughts on the outcome!

Want more?

If you want to connect more with Methodical Living follow me at Pinterest, Twitter, Facebook, and Instagram.

Tuesday, February 25, 2014

DIY Tiered Plate Stand

How is everyone doing today? I'm ecstatic about this beautiful, sunny weather that North Georgia has been experiencing. Its a great change from the cold and snow of last week; so, I'm trying to soak up all of this amazing weather before it turns to hot to stand! I hope that everyone else is enjoying the beautiful weather too!

Tiered Plate Stand

Today, I will be sharing an easy tutorial on how to make your own tiered plate stand with just a few things. As you all probably know, I'm obsessed with organization. I like my house and my life to be neat, clean, and tidy. And this tiered plate stand is just the best at holding onto all of my little knick-knacks and looking chic at the same time! Plus, it was a super amazing deal because almost everything I used to make it came from the dollar store.

Tiered Plate Stand Tools:

-plate
-bowl
-resin
-candle stick

Tiered Plate Stand Directions:


  1. Mix your resin together.
  2. Apply the resin mixture to the bottom of the bowl and the middle of the plate.
  3. Place the candlestick where you have applied your resin mixture, and hold for a few minutes.
  4. Allow the resin mixture to cure for at least 12 hours.
  5. Use your brand new tiered plate stand to hold your keys, jewelry, or whatever else!

Questions? Comments?

If you have any questions or comments please feel free to leave them below!

Want to see something?

Is there something that you want to see here on Methodical Living? Well, if there is, feel free to email me here with whatever you want to see, and I'll get back to you as soon as possible!

Want more?

Do you want more of Methodical Living? Follow Methodical Living on Pinterest, Facebook, Twitter, and Instagram for the latest updates, pictures, and information!

Monday, February 17, 2014

Simple DIY Bracelet

Hello everyone! I hope that you all enjoyed a fantastic Valentine's Day and had a relaxing weekend. I can honestly say that this Valentine's Day was the best ever that I have had. My husband is so sweet and caring! 

He brought me tulips home then took me to Build-A-Bear to make my very own Hello Kitty! The line was long, but we enjoyed eachother's company while we waited, and it really was the perfect start to a great evening! I'm not a very romantic person so we enjoyed chicken wings, horror movies, and a few shots of vodka to really finish off our evening.

The weekend turned into a Stephen King film fest. I am a big fan of Stephen King, and all horror movies, books, and whatever else I can get my hands on! I'm pretty sure that we watched a good majority of Mr. King's movies from the 70's, 80's, and 90's. It was amazing.

Enough about my weekend! Today, I'm going to share with everyone a great little do it yourself tutorial on how to make a simple bracelet to really start your week off right!

The story behind the bracelet

Like most things, this bracelet has a story behind it. My husband is a mechanic at heart and always will be. Unfortunately, that means that I have an endless supply of nuts, bolts, and screws just laying around my house. Actually, now that we're in the new place, I'm trying to implement a new storage system for his tid-bits to keep them off of my floors and in a spot where he can find them when he needs them.

I love miniature things.

I have a deep, compassionate love for all things tiny and oversized. Honestly, I think it is because I can either feel like a fairy-sized person or a giant which is always neat. I found super small nuts in my husband's pile of randomness. Honestly, these things are SUPER cute! See, I can make even the manliest things seem girlie. I also have a deep-rooted passion for unique jewelry. So, I combined my two loves to make this super cute bracelet.

Materials you will need:


  • Tiny nuts
  • wire
  • chain
  • connectors
  • clasp
  • needle nose pliers

Instructions:


  1. Connect the three nuts together using the wire. Simply, put two together and wrap until they are secure. 
  2. Next, repeat step one two more times. 
  3. Connect the bolts to the chain using the wire and connectors.
  4. Enjoy your new bracelet!

Questions? Comments?

Feel free to leave any questions or comments in the section below!

Want to see something?

If there is some question or problem you need answered feel free to email me here. I promise that I'll reply to you as soon as possible!

Want more?

Do you want more Methodical Living? Visit me on Pinterest, Facebook, Twitter, and Instagram.

Tuesday, February 11, 2014

DIY Valentine Garland

Good morning everyone! I hope that everyone is enjoying their week. Apparently, there is a cold front that is affecting most of the United States. Here in Georgia, it is pretty cold, and we're expecting snow today or tomorrow- fingers crossed.- Today, I will be sharing a do it yourself tutorial for making Valentine garland.


DIY Valentine Garland

I bought some heart decorations at the dollar store and was pleasantly surprised to find that I could use them in several projects. That was a dollar well spent! 

I knew that I wanted some type of Valentine garland, but I wasn't sure how I was going to actually construct this garland. Finally, last night I came up with this idea to simply connect all of the larger decorative hearts using connector rings. The connector rings are most commonly used in jewelry making, and luckily I had more than enough stashed away for this project.

Here's how to make the Valentine garland:

Tools:

  • Lots of large hearts
  • Connector rings
  • Needle Nose Pliers
  • A Piece of Wire

Directions:

  1. Poke holes in the far end of each hearts using the piece of wire.
  2. Open the connector rings with the needle nose pliers.
  3. Connect the hearts together, and close each consecutive connector ring.
  4. Hang up and enjoy!


Its simple, cute, and festive!
This garland seriously only took about 30 minutes to make, but it looks so darn cute! I'm considering keeping it up year round to add some festive, glitterness to my life! 

Questions? Comments?

Feel free to leave any questions or comments you have in the space below!

Want to see something? 

Do you have an organizational question or concern that you would like help with? Email Methodical Living here, and I will do my best to get back with you as soon as possible.

Want more Methodical Living?

Want more? Follow Methodical Living on Pinterest, Twitter, and Facebook.

Thursday, February 6, 2014

DIY Heart Bracelet


I was thinking about great Valentine Day crafts, and I was at a complete loss. I had previously bought a small bag of table decorations in the shape of hearts at the dollar store. I decided to use these great decorations to make a heart bracelet that could look cute on anyone.

I made two separate bracelets in two different ways. One with superglue and one with wire. The pink one was made with the wire and the red one was made with superglue. Here's how I made each one.


Red Bracelet:

Tools:


  • Leather cord
  • Heart
  • Superglue


Directions:

1. Scrape all of the glitter off the back side of the heart.
2. Put a dab of superglue on the leather cords.
3. Let the glue dry.

Pink Bracelet:

Tools:


  • Leather cord
  • Heart
  • Wire
  • Pliers


Directions:

1. Poke a small hole one side of the heart and connect the leather cord by wrapping it in wire.
2. Wrap the other side the same way.

I hope that everyone enjoyed this tutorial!

Questions? Comments?

Feel free to leave any personal stories, questions, or comments in the space below!

Wanna see something?

If there is something that you would like to see here at Methodical Living shoot me an email here.

Friday, January 31, 2014

DIY Spice Rack

Spices can be a great way to add variety and flavor to any dish. Keeping all of your spices organized can become a hassle. This is exceptionally true when your cabinets aren't spice friendly.


Spices, spices, and more spices

I have a plethora of spices because cooking is an essential part of my home life. I've always had problems with how I'm going to organize and declutter my spices. Normally (against all of my better judgements) I just toss all of my bottles into a cabinet and forget about them until I go to grab a certain spice. Then, I'm left to shuffle and move things around until I find the one spice that I actually need.


How I solved my problem

Finally, I got tired of playing the shuffle spice game, and I was determined to make something to organize and declutter my cabinet. So, my husband and I made a great spice rack so that all of my spices would be visible.


How to Make Your Own Spice Rack

Tools:

-saw
-wood
-drill
-screws
-clamps

Directions:

  1. Take measurements to determine the height and width that will be needed. Take into consideration the width of the wood.
  2. Cut the side pieces in the shape of a L. We used a height of 5'' for the top shelf and 2.5'' for the bottom shelf.
  3. Cut your shelves. You will have four shelves.
  4. Put everything together with the use of clamps. Make sure each piece of your spice rack fits together perfectly and fits into your cabinet. If not, make the necessary adjustments.
  5. Carefully, use the drill to create places for the screws while using the clamps to hold everything together. Then, screw everything together.
  6. You have the option of sanding down your spice rack and painting it.
  7. Place all of your spices neatly in your cabinet!

Questions? Comments?

If you have any questions or comments feel free to leave them below.

Want to see something?

If there is something that you would like to see on Methodical Living, feel free to send me an email here.
Related Posts Plugin for WordPress, Blogger...