Showing posts with label Make it. Show all posts

Thursday, January 30, 2014

Cooking Tips and Tricks

Image C/O PhotoPin {1}

Cooking Tips and Tricks to Make Cooking Simple

Cooking can be a great way to relieve stress. Plus, the results of cooking are pretty yummy. Typically, my husband cooks and I clean, but on the rare occasion I can whip something fantastic up with little to no effort. I did work in a fancy-smacy cafe for almost a year; so, I picked up a couple of cooking tips to make cooking easier and more fruitful.

My mom is a great southern cook, and a lot of my skills do come from her. Oddly, I can't stand the smell of meats cooking. That's why I make my husband do a lot of the cooking. I make great vegetables, rice, and Italian foods.

1. Keep your knives sharpened. 

It really depends on how much you use each specific knife. Typically, I will sharpen all of my knives once per year. Also, never, ever put your good knives in the dishwasher. The intensely hot water will eventually warp the blades.

2. Never bake with cold dairy and eggs.

Using dairy products or eggs that have just come out of the fridge creates dense cakes, pastries, and baked goods. Using room temperature eggs and dairy products creates fluffier baked goods. Try this, take your eggs and milk out of the fridge before you begin. Go ahead a start your prep while the eggs and milk warm up.

3. Never cut meat right after you take it out of the oven.

Cutting meat right after it is taken out of the oven will squeeze all of the juices out of the meat. Instead of juicy, delicious turkey you will be left with dry, terrible turkey.

4. Use the right size cutting board for the job you are doing.

Using a cutting board that is too small will increase the risk of cutting yourself. Using a cutting board that is too large is just a big mess to clean up. Try to always pick the cutting board that is just right for the job you are doing.

5.Adding spices, such as, garlic too early can be a serious rookie mistake.

Everyone has done it from time to time, we all get super cooking happy and want to toss in meat, vegetables, spices, and everything else into your pan. Taking your time and making sure that everything is well cooked before you add your spices will make everything taste so much better.

Have questions?

Feel free to leave any questions or comments below.

Want to see something?

If you want to see something or need an organizing solution, feel free to email Methodical Living here.

Monday, January 27, 2014

DIY Drawer Organizers

Happy Monday everyone! I hope that everyone enjoyed their weekend. The hubby and I finally had two days to just kick back and relax; which, we did to some extent. We also used the time to do a few things that we had been putting on the back burner for some time. The hubby spent his time working on his truck. He installed a new stereo and speakers. I spent some time dreaming up more great organizing tips and tricks, such as, the drawer organizers that I will be sharing with you today.


Declutter Your Kitchen Drawers

This is another post in the Organize It: Organize and Declutter Your Kitchen series.
Are your drawers cluttered, unorganized, and hard to open?
My kitchen drawers were looking a little rough. All of my kitchen utensils were scattered everywhere, and it was getting hard for me to find anything. Honestly, I wasn't sure what I was going to do. I knew that I had a large cardboard box that was taking up room in my house, and I didn't want to throw out something that could be repurposed. So, I decided to make some drawer organizers out of cardboard.

The Downfall of Cardboard Organizers

Apparently, cardboard attracts bugs, and will not hold up for very long. So, these organizers are only temporary. I had planned on painting them, but since they are just going to be in my drawer for a little while, I decided to not waste the paint. The hubby and I are planning on making some wooden organizers using the cardboard organizers as a template. But for now, my kitchen drawer is nice, tidy, and organized.

How to Make Drawer Organizers

Tools:

-Exacto Knife
-Cardboard
-Pencil

What to do:

1. Clean out your drawer.
2. Cut out one big side of your box.
3. Measure the inside of your drawers.
4. Draw out each piece on your box using the measurements that you just took. Make sure that your lines are straight!
5. Cut out all of the pieces.
6. Put each piece in your drawer and size everything up.
7. Cut slits in every piece so that they go together perfectly.
8. Trim all pieces if they do not fit right.
9. Put everything back in your drawer!

Presto! Your drawers are clean, organized, and decluttered!

Feel free to leave a question or comment below!

If you would like to see something on Methodical Living shoot me an email and let me know!

Wednesday, January 22, 2014

DIY Fridge Workspace

Good afternoon fellow organizers, declutters, and clean freaks! I hope that everyone is enjoying their Wednesday.


Another Magnet Tutorial

Continuing with the Organize It: Organize and Declutter You Kitchen series, I will be sharing an easy tutorial on how to turn your fridge into a simple workspace. With this tutorial, I will show you how to make a space for your pens, papers, coupons, and pretty much anything else that you need. Everything will be at your disposal, and you'll never have to look for a pen and paper again. My workspace is still pretty small, but I just couldn't wait to share this tutorial with everyone!


Here's how you can turn your fridge into a workspace

Tools

-Magnets
-Super glue
-Cups, tins, or whatever you have laying around your house


Directions

-Super glue the magnets to your cups and/or tins.
-Laying the tin and/or cup with the magnet facing up, and let the glue dry.

-Set up your new space by adding paper, pens, pencils, and anything else!

Feel free to leave any questions or comments in the space below!

DIY Plate Shelf

Hello everyone! I hope that everyone is enjoying my Kitchen Organization series, and are using these tips, tutorials, and tricks to revamp, declutter, and organize your kitchen. My kitchen is looking a lot better, and I'm able to find everything that I need, when I need it. There's no more searching around for random tools, utensils, and other things.


The tutorial that I'm going to share with you in this post is one that I've put off for way too long. This tutorial will show you how to make a plate shelf that you can simply put in your shelf, and you'll instantly have an extra shelf! I've found that an extra shelf in my cabinet adds a lot more much needed space.


Tools:
-Wood
-Screws
-circular saw
-drill with the appropriate bit
-Clamps
-Stain or paint


Directions:
-Measure the space in your cabinet and get a width and height. I did this by putting my large plates in the cabinet and measuring how tall and wide they were.
-Cut your wood accordingly. You will have three pieces of wood: one as a base and the other two will serve as legs. Be sure to calculate the width of the wood into your calculations, or your shelf may not fit into your cabinet.
-Take your clamps, and clamp your pieces together.
-Screw the three pieces together.
-Stain or paint the shelf, and sit it aside to dry.

-Put the shelf in your cabinet and stack up your dishes!

If you have any questions or comments feel free to leave them below!

DIY Kawaii Fridge Magnets

I will always be a kid at heart. My love for cute, fuzzy things seems to grow the older that I get. I was randomly browsing through ebay a few days ago, and saw a teddy bear magnet. I thought that it was a cute idea to have toys on the fridge. I decided to combine my love for cute, fuzzy things with this week's series of post called, Organize It: Organize and Declutter Your Kitchen.

A Simple DIY Tutorial That You Can Make In Less Than Ten Minutes

Today, I'm going to show you an easy, do it yourself tutorial to make kawaii magnets for your fridge. For my magnets I used two kola bears thatI've had for about twelve years. I spotted these little dudes just gathering dust in the far expanses of my closet and took pity on them.


Here's how you make these cuties:

What you'll need:

-cute, small toys
-super glue
-magnets


Directions:

-Take a large magnet and cut it into small sections.
-Add a dab or two to the magnet and carefully place it on your toy.
-Let the toy sit with the magnet sitting up to dry for a few minutes.
-After the glue has dried, decorate your fridge with kawaii cuteness!


I hope that everyone enjoyed this tutorial! Feel free to leave any questions or comments below!

Tuesday, January 14, 2014

DIY Skull Necklace

As everyone may know, I love to craft pretty things. This week, I'm showing you how to make this gorgeous skull necklace! I purchased these beautiful handcrafted skulls from a local gem shop in the small, mountain town where me and the hubby had our honeymoon. I had this great idea to make the skulls into necklace pendants, and the results were great! This is honestly, one of the easiest DIYs I have ever done!

How we found the skulls for our DIY necklace.

We bought a pair that came with a story. The man who owns the shop swears that the pair of skulls always fell facing each other, like they were talking. Actually, as most great purchases go, we weren't expecting to purchase the skulls. But, they just caught our eye, and the story was just too cute. If you don't have a gemstone skull, don't worry! This tutorial can be used for a number of other gemstones! Just get creative and discover what you can come up with.


How to Make the Necklace:

What I Used:
-length of chain with clasp
-skull gemstone
-resin
-small silver finding

Tutorial

Step One 

Mix the resin according to the directions on the package.

Step Two 

Apply a small amount of resin and connect the small silver finding to the gemstone.

Step Three

Let the resin cure. For the particular type of resin that I used, I had to wait about 13 hours. To find out the cure time for your resin, check on the package.

Step Four

Slip the gemstone on the chain.

Step Five 

Enjoy your new necklace!

Try it out for yourself and let me know how your's turns out! Leave your stories and comments below!

Have a great weekend!

Homemade Ramen Recipe

Ramen is an inexpensive meal

Ramen is known around the world as being an inexpensive, tasty meal, especially for college students. Ramen is the perfect meal if you are running low on cash. I actually scooped up this twelve pack of Ramen for just a tad over a buck.
homemade ramen recipe

I choose the chicken because I'm really picky out the meats I will and will not eat. But, as your probably know, Ramen comes in many different flavors, such as, beef, shrimp, spicy chicken, and so many more.

Perk up your boring, Old Ramen with this Homemade Ramen Recipe

I've eaten my fair share of Ramen noodles in my life, but I always felt like something was missing. Now, that I'm out of college, I can't eat just plain Ramen all of the time. Luckily, I'm not in a situation where I have to eat Ramen every night. When I get the craving for something yummy I just make my homemade ramen recipe. This homemade Ramen is nutritious, delicious, and very addicting. Plus, there aren't really any set ingredients. Simply use the items you have available in your fridge.
homemade ramen recipe

Here's what you'll need:

-a variety of mixed vegetables
-pre-cooked chicken, beef, or shrimp
-a pack of Ramen
-an assortment of spices
homemade ramen recipe

homemade ramen recipe

homemade ramen recipe

Directions for Homemade Ramen Recipe:

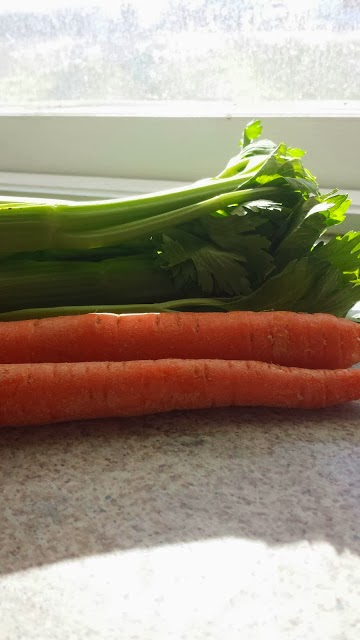
-Chop up your vegetables. I used carrots and celery because that's what I had in my fridge.
-Cook your Ramen as your normally would.
-Cook your vegetables in a frying pan. I added minced onions at the very end of this step.
-Throw in your pre-cooked meat after your vegetables are almost cooked.
-Add spices to your taste. In mine I used chili powder, cayenne pepper, a bit of salt, and black pepper.
-Throw in your already cooked Ramen and mix everything together.
-Enjoy!

Friday, January 3, 2014

DIY Bed Canopy

Image C/O PhotoPin

There's something about forts and canopies that give me a nostalgic, fuzzy feeling inside. I don't like cleaning up the mess, but I love them all the same. Being huddle up in a fort reading, listening to music, or even watching a movie can erase fears and worries.


Oh the possibilities are endless with bed canopies...

Bed canopies can be a great addition to any room, and they are extremely versatile. The outcome of the bed canopy depends on the material you choose and other accessories, including, twinkle lights, flowers, and garland. If you're looking for a DIY bed canopy that is easy to make an inexpensive, you have come to the right place!


Forts, bed canopies, and tepees, oh my!

I absolutely love bed canopies, tepees, forts, and tents. I guess you could say that I'm still a kid at heart. Something about the coziness of it just sounds like good times to me. I've had several bed canopies that are homemade, and I have loved every single one of them. For my current bed canopy, I decided to use twinkle lights. Actually, the lights add just enough light to watch a movie, which is perfect. The small steady twinkling of lights also adds a sort of ambiance. 

If you want to make this homemade bed canopy, here is how I made mine.

Tools and Materials:

-Embroidery hoop
-two curtain panels or a yard of fabric
-hook
-lights (optional)
-flowers (optional)
-garland (optional)


Directions:

Step 1: Open the quilting hoop and secure the window panels or fabric.
Step 2: Close the quilting hoop back.
Step 3: Place the hook on the ceiling securely. Make sure that the hook will be able to hold the weight of the fabric and hoop. If the hoop isn't securely fastened, the canopy will fall down on top of your head.
Step 4: Tuck the excess fabric around the post or secure the fabric around your bed.
Step 5: Enjoy your beautiful, new addition to your room.

If you have any questions or comments on how to make this bed canopy, feel free to leave a message below!

Monday, December 16, 2013

Frizz Free Hair

How was everyone's weekend? Mine was pretty great. I took some fantastic, Christmas pictures during mine and my husband's trip to Athens, Ga. We munched down on some fabulous Korean food and just had loads of fun. Saturday, a long time friend and his significant other stopped by and we played some great board games, including, Muchkin.

I got pulled into this game called Spirit Stones. Have you played? Its pretty addicting.  If you do play, feel free to add me. My friend code is V2556293. If you haven't played it yet, you can find it in the Google Play Market here.

Now, on with today's post!

Do you have frizzy, damaged hair? Has it become almost unmanageable? Do you wish that you could just switch hair with someone else?

Never fear! When there is a will there is a way to make your hair into the beautiful locks you want and deserve!
frizz free hair

Frizz Free Hair 

My hair is the worst kind of damaged. I straighten it, dye it, and up until recently I bleached my hair. Every time I visit a salon to get my split ends taken off, the stylist always replies about how incredibly damaged my hair is. One even told me that my hair looked mangled! That isn't really what any girl wants to hear.

I've tried pretty much every hair product to free my hair of the frizz. Most of the time, these products do nothing for me, expect for the huge dent that they leave in my wallet. I do use some different types of oils to manage my frizziness in between washing, but if I use too much oil my hair looks greasy and terrible. So, I set out on a quest to find a solution to my frizzy hair.

I've learned some pretty neat tips and tricks to make my hair look healthy and shiny without making it look greasy in the process. I shall impart the knowledge that I have learned with you now.

Frizz Free Hair Tips

1. To get shiny hair, wash your locks with cold water. If you can't stand cold water, just leave the tap running with cold water and stick your hair underneath the water flow. Your body won't have to feel the cold, but your hair will reap all of the awesome benefits.
2. Get rid of those split ends! True, cutting your hair won't make it grow faster, but it will help to make your hair healthier. Split ends will continue to split all the way up the hair shaft, and that can lead to some serious hair problems.
3. Revamp your diet. Make sure that your diet provides a lot of nutrients for your hair, skin, and nails. Typically, vegetables and fruits can improve your hair.
4. Vitamins and minerals, such as, Biotin, Vitamin E, and Fish Oil can provide extra nutrients to make your hair healthy and shiny. These supplements can even increase the rate at which your hair grows! Before taking any supplements make sure that you talk with your physician.
5. Massage your scalp for a few minutes each and every day. Massaging your scalp will improve the flow of blood to your hair follicles. This tip can help your hair grow faster!

Bonus tip to banish the frizz!

Once a week, I put olive oil on my hair, especially on the ends.
I let the oil sit for a few hours. The frizzier and more damaged my hair is, the longer I let the oil soak in.
Then, I shampoo and condition as normal. The result is beautiful, frizz free hair. You can hardly tell that I color my hair or use harsh styling tools!

This is honestly my number one go to hair remedy. If you don't want to use olive oil you can always substitute coconut oil.

Enjoy your Monday!

Feel free to leave any, questions, comments, or you very own personal story with hair care below!

Thursday, December 12, 2013

DIY Eye Candy for Your Walls Tutorial

Are you tired of looking at boring, white walls? Adding a personal touch to your home can be easy and inexpensive. Here is a great do it yourself tutorial to make eye candy for your walls. Try making these babies in different colors and add a pop of color to brighten your home and day. I wrote up a tutorial last year and shared it on my blog, but I've taken that particular post down; so, here is the new updated tutorial. 

I made these babies a year ago, and they have provided a cheery spot on one of the walls of my bedroom ever since. I've been wanting to get them framed, but they seem to be great without the frames! They add a fantastic pop of color and elegance. Plus, they are super easy and inexpensive to make.

Here is what you will need for this tutorial:

-blank canvases
-two different colors of spray paint (in any colors your want)
-lace
-tape
-a place to safely paint without getting any paint on yourself or your car

Directions:

1. Find a place to safely paint without getting any paint on yourself, house, or your car. Also, make sure that the weather is spray paint friendly. If the wind is blowing too hard you may want to wait for more favorable weather.
2. Paint your canvases the base color. I chose red because I only had red and white spray paint. Wait 15-20 minutes for your base color to dry.
3. Tape lace to the canvases and make sure that the lace is smooth and straight. Make sure that the lace is securely taped to the back of the canvases so that it will not move and smear the paint.
4. Spray your canvases with the top color. 
5. Set the canvases in a safe place and wait for 45 minutes to an hour for your top color to completely dry.
6. Hang up your canvases.
7. Enjoy your new canvases and the new pop of color in your home! 

I hope that everyone enjoys this tutorial. Feel free to leave all of your questions and comments below! Also, if you make these share your experiences below.

Sunday, November 17, 2013

DIY Statement Necklace

Make a Statement with this DIY Necklace

Image C/O Lara Kern
Since I do a lot of my work online, I don't really put too much thought into what I wear on a daily basis. Most days, I'm pretty focused on this blog, my art, or my (hopefully) soon to be open Etsy shop. So, I spend a good majority of my time in baggy clothes. I do however occasionally get the urge to make something pretty to wear around as a treat.

The hubster and I went in together to make this necklace that definitely makes a statement. It really is only a one woman (or man) job, but it was nice to spend time creating this beautiful statement necklace together. Plus, he's better with wire wrapping than I am. I just can't seem to get the right shapes or the wire just ends up breaking. Sometimes, I can create beautiful things out of wire, but my skills in this department are sporadic at best.

What you'll need: - Needle nose pliers - One piece of quartz - Wire - 1 shell case (I used a 9mm shell case) -Resin -A length of chain -Metal File -Hook and clasp

Step 1: Make sure that your quartz fits into the shell casing snugly. If your piece of quartz is too big you can sand it down to a more suitable size with a metal file. Remember that the quartz should fit snugly and securely in the shell casing.

Step 2: Mix the resin by carefully following the instructions on the box or container. Read all of the instructions that came with your resin. Be sure to get the correct curing time. I waited for about 13 hours before my pendant was fully cured.

Step 3: Carefully, fill the shell casing about 1/2 to 3/4 of the way full. The amount you will use is based on what caliber of the shell casing you choose to use. We filled our shell casing up to about 1/2 with resin. Be careful not to get any resin on you, your clothes, or any place else that is not part of this tutorial.

Step 4: Push the quartz down into the resin. Sit your soon-to-be statement necklace with the quartz point up so that none of the resin will leak out. I used clothes pins to hold the pendant in place. Make sure that your pendant is safely secured in a place where it will not be knocked over or disturbed for at least 13 hours. For a more accurate curing time for your specific type of resin, check the container or box it came in.

Step 5: (this is where the hubby stepped in.) He simply used a spare piece of wire that was about 5-6 inches long. He began by wrapping each side of the wire evenly around the shell casing a few times. Then, he made a loop, and finished it all off by tucking the ends of the wire securely to either side of the shell casing.

Step 6: Connect the hook and clasp to your length of chain. Then, add your now fully cured pendant.

Step 7: Enjoy your new DIY statement necklace and bask in the compliments you receive.
Image C/O Lara Kern
If anyone has any comments or questions on to make this necklace, feel free to email me (here) or leave a comment below!

Related Posts Plugin for WordPress, Blogger...